Automated Rules
Goal: Products of a vendor get the right manufacturer, responsible person and importer without you touching them.
A rule says: “Products from vendor X get manufacturer A, responsible person B and importer C.” The app applies the rule to new and updated products automatically. For products that are already in your store, you apply the rule once yourself. A rule only sets these three entities; it never changes warnings, CE marking or other fields.
Open Automated Rules in the left navigation.
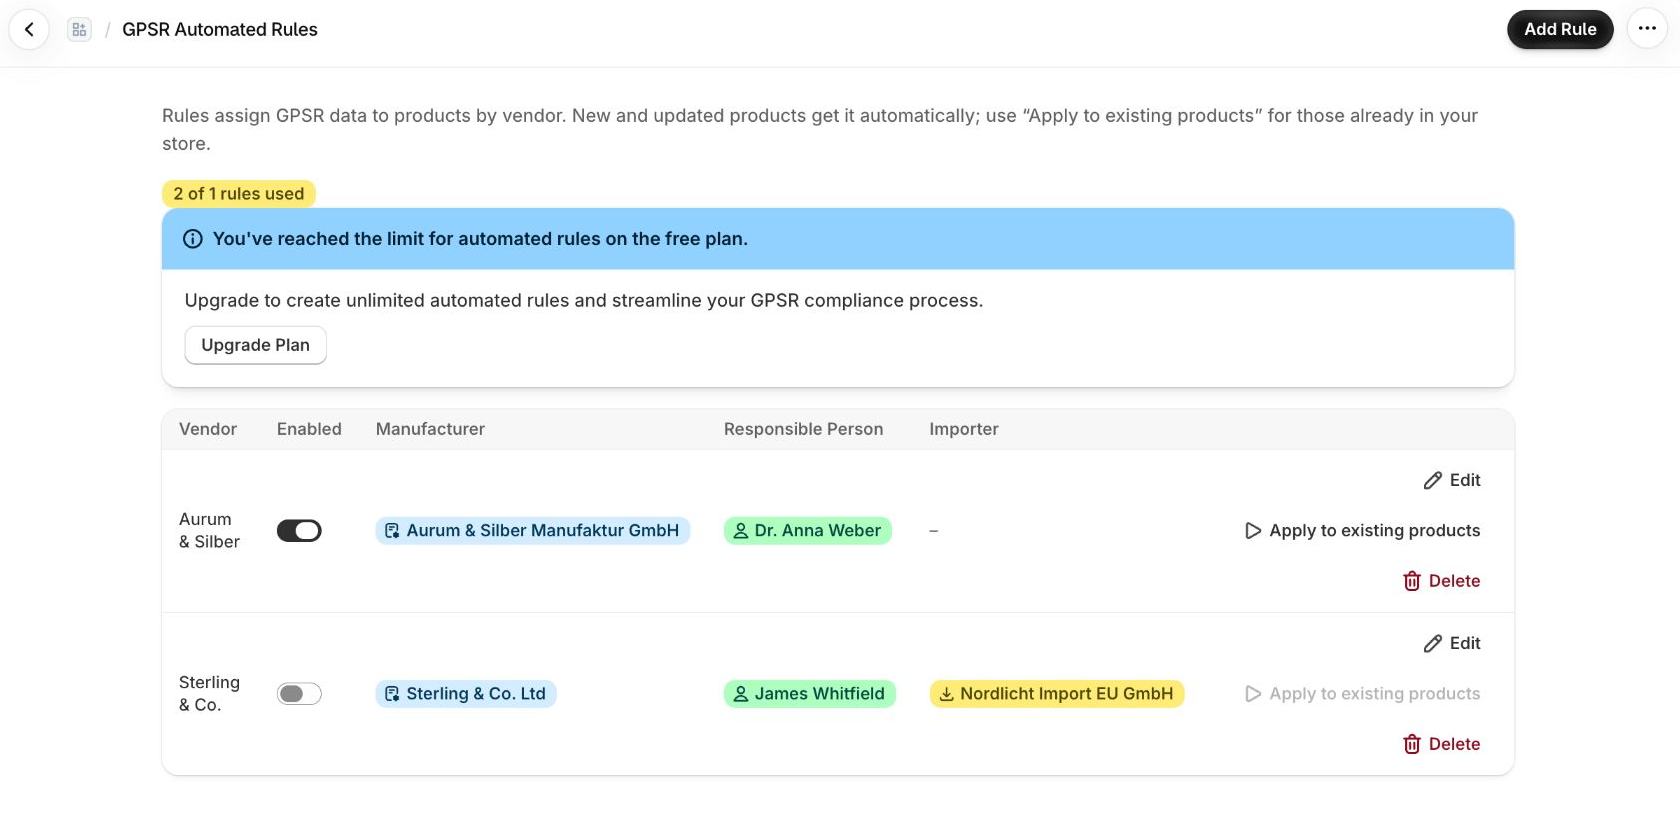
Plan limits
- Free and Basic: 1 rule.
- Pro: unlimited rules.
The list shows “X of Y rules used”. A disabled rule also counts. When you reach the limit, the app offers an upgrade (see Plans & Features). If you move from Pro to a smaller plan, your existing rules keep working and can still be edited; you just can’t add new ones.
Create a rule
- Click Add Rule.
- Choose the Vendor: start typing and pick it from the suggestions. Leave it empty for Products without a vendor. The vendor must match the products’ vendor exactly: “Acme” and “ACME” are different vendors.
- Choose the Manufacturer. This is required.
- Optionally choose a Responsible Person and Importer. Leave a field on Do not set to leave it untouched. If you have not created the entity yet, add it under Entities first.
- Keep Rule enabled switched on and click Save Rule.
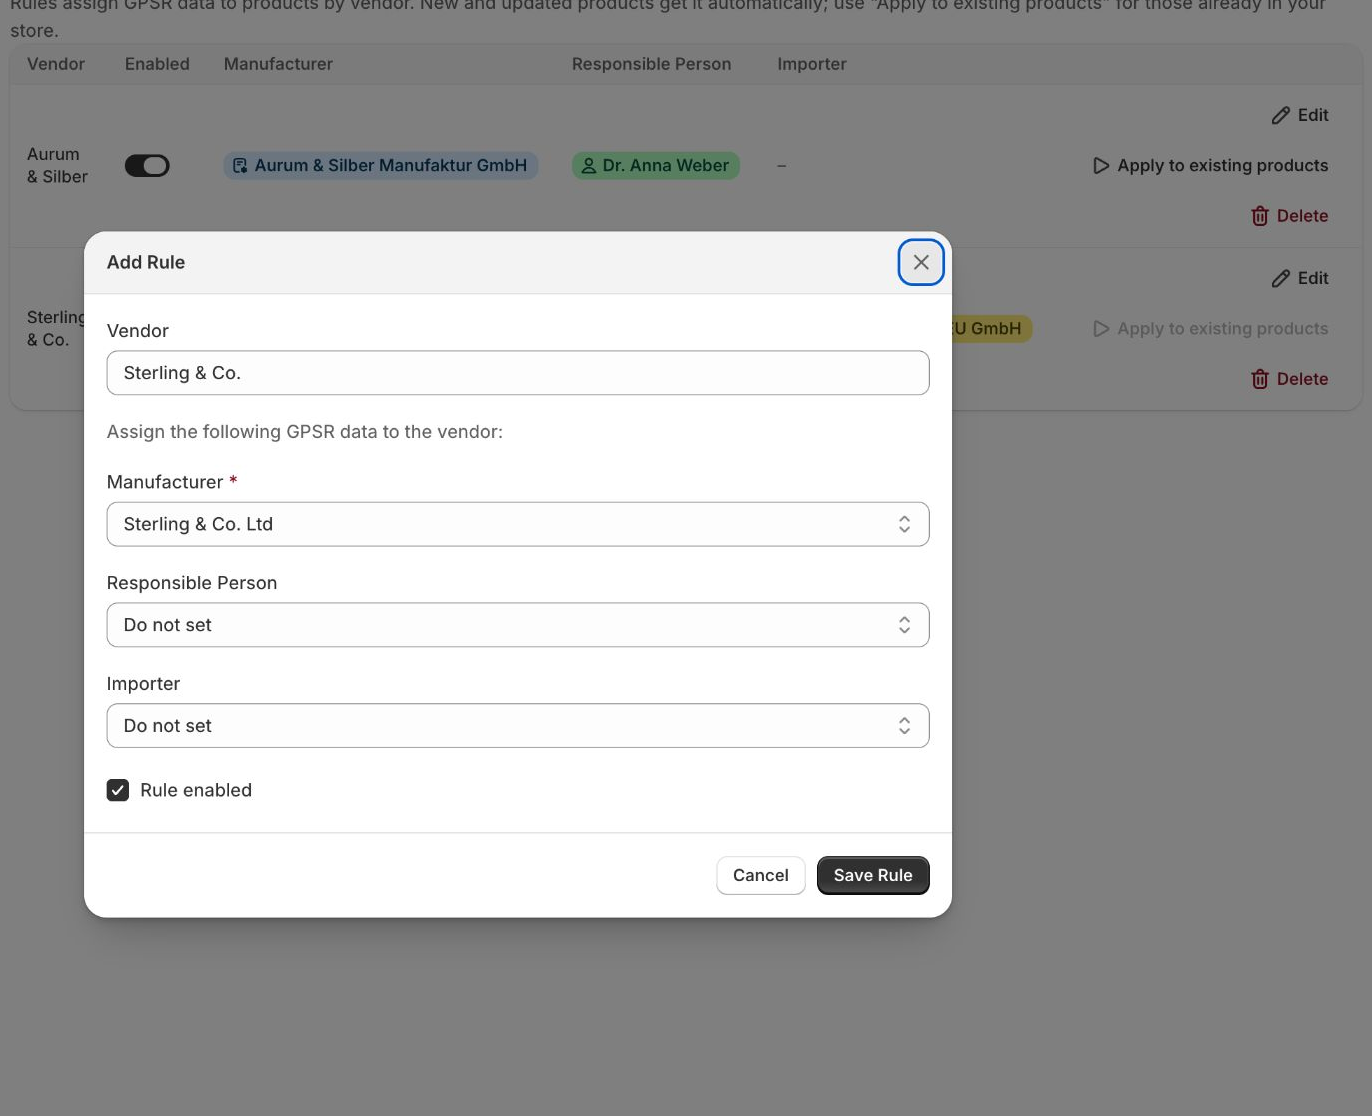
There can be only one rule per vendor.
What happens when products change
When a product is created or updated in your store (in the Shopify admin, by a CSV import or by another app), the app looks for an enabled rule for its vendor and writes the entities to the product. Products that already match are not changed.
Important: While a rule is enabled, it sets its entities again every time a product of that vendor is updated. If you choose a different manufacturer, responsible person or importer on such a product by hand, the rule replaces it at the next update. Set that field to Do not set in the rule, give the product a different vendor, or switch the rule off.
Note: Rules for products without a vendor only apply to new and updated products, not to existing ones.
Apply a rule to existing products
- Click Apply to existing products in the rule’s row. The button is only active for an enabled rule with a vendor.
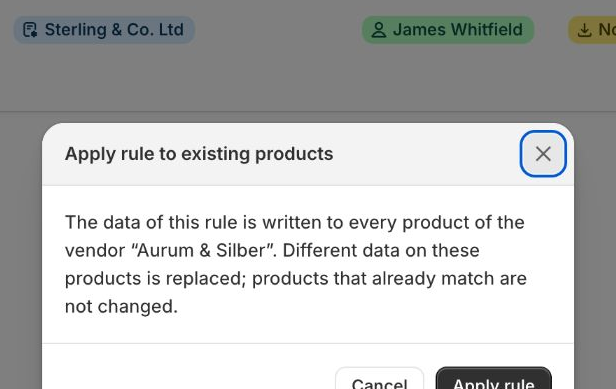
- Confirm. The data of the rule is written to every product of that vendor, replacing different data on those products. Products that already match are not changed.
- A progress message shows “Applying: X of Y products”. Wait until it says the rule was applied.
If another bulk operation is running (for example Edit all matching in Bulk Editing), the app asks you to try again in a few minutes.
Disable or delete a rule
- Switch the rule off with its toggle in the list to pause it without losing it. Use the Status filter to see enabled or disabled rules.
- To change a rule, click Edit. Delete Rule in the same dialog removes it. Products keep the data the rule already assigned; new products of that vendor will no longer get it.
If an entity used by a rule was deleted, the rule shows Entity deleted. Edit the rule and choose a new one.
