Legal Guarantee Notice
Goal: Shoppers see the official legal-guarantee notice in their own language.
Open Guarantee & GARAN labels in the app. See the overview first if you are new to this.
Switch it on
In Settings, switch on Show the legal-guarantee notice and click Save.
Put it on your storefront
There are two ways, and you should use only one of them. With both, the notice appears twice.
| Option | Where it shows | How to add it |
|---|---|---|
| Guarantee notice block | On the product template you add it to. | Theme editor > product page > Add block > Guarantee notice. |
| Guarantee notice (global) embed | On every page of your theme, and in the cart. | Theme editor > App embeds > switch on Guarantee notice (global). |
Cart and drawer
If your theme shows the cart in a drawer or pop-up, only the global embed appears there, right above the checkout button. Switch the embed on if you want the notice in the cart drawer.
Block settings
The notice block has settings for the title, whether it is open by default, whether to show the EU information link, alignment, width, style and colors. They work like the widget settings.
Exclude products
Some products don’t need the notice. The app leaves out:
- Always: gift cards, and digital or service products (no variant requires shipping).
- Your rules: add rules under Automatic exclusions that match a Collection, Product type, Tag or Vendor by exact value. Every matching product is left out. Click Add rule, choose what to match on, enter the value (for a collection, its handle) and click Save in the save bar at the top. The rule shows how many products it matches. You can add up to 50 rules.
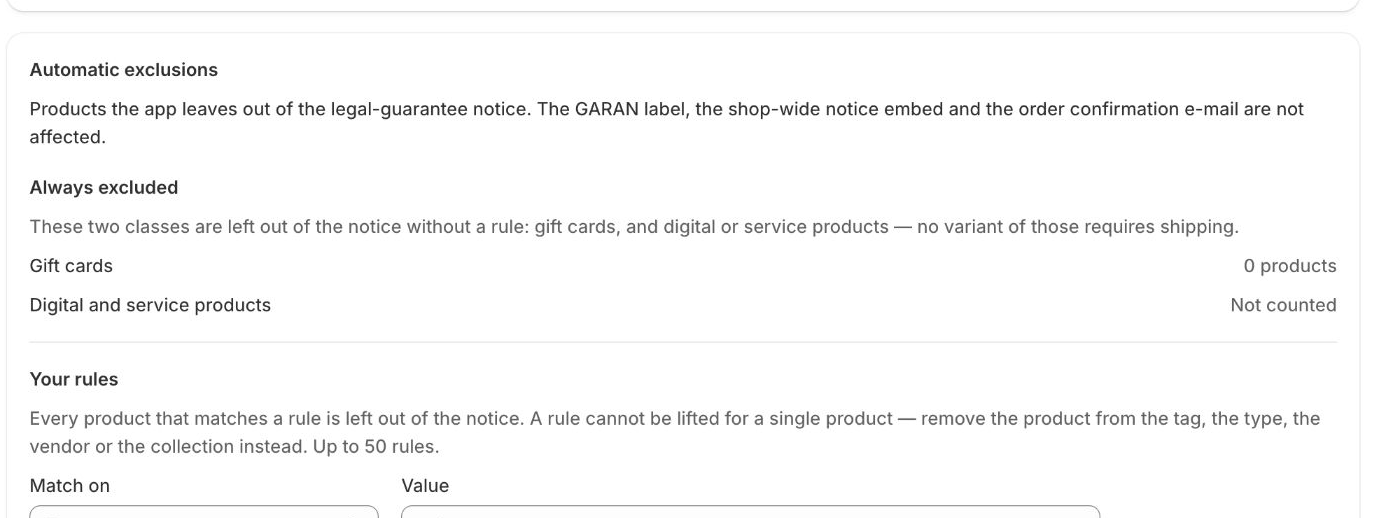
A rule cannot be lifted for a single product. To bring a product back, remove it from the tag, type, vendor or collection.
Exclusions only affect where the notice is rendered for that product (the product-page block). The GARAN label, the shop-wide embed and the order confirmation e-mail are not affected.
Exclude a single product
In the GARAN labels list on the same page, search the product and click Change next to Notice. In the Notice and used goods dialog, switch on Leave this product out of the notice and click Save. The same limits apply.
Used goods
For a product you sell as used, switch on Offer this product as used goods. The notice for that product then carries a used-goods marking. This only adds the marking; it does not hide anything.
You can set both flags per product in the app, or for many products at once in the CSV (excluded and used columns).
Order confirmation e-mail
To send the notice and labels with the order, add the snippet to your Shopify order confirmation notification:
- In the Order confirmation e-mail card, click Copy snippet.
- Click Open notification settings, open Order confirmation and choose Edit code.
- Paste the snippet where you want the notice to appear and save.
- Back in the app, click Mark as installed. The app cannot read your notification templates, so you confirm this yourself.
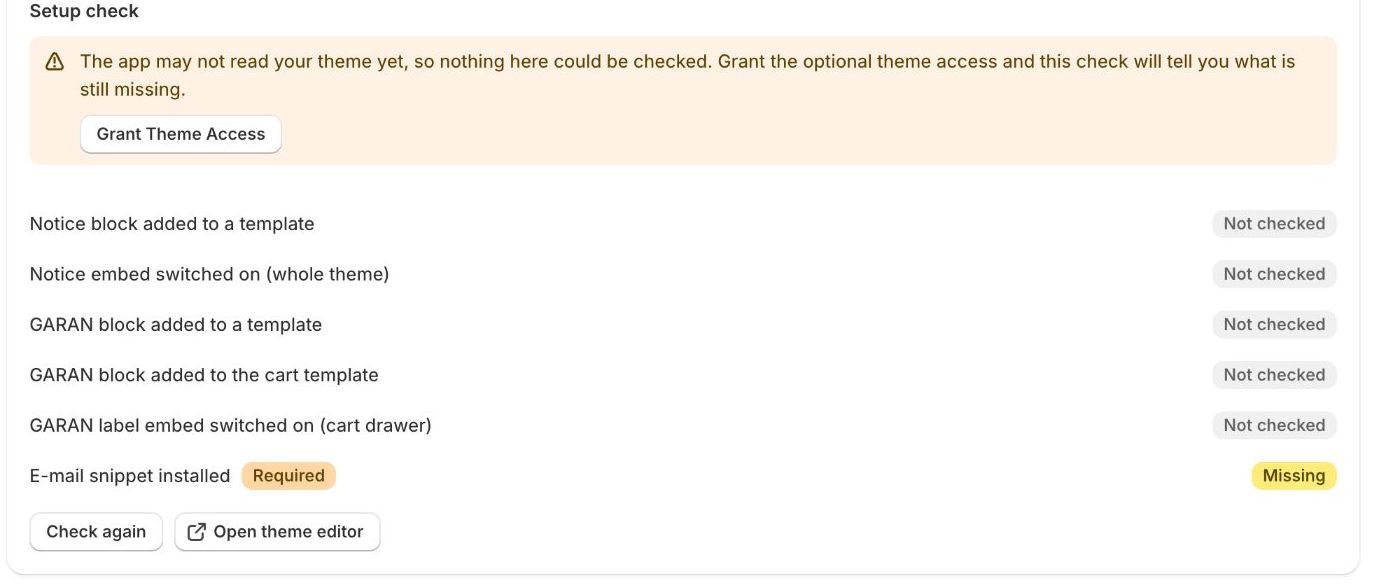
Setup check
The Setup check lists what is done and what is missing, marked Required or Optional:
- Notice block added to a template
- Notice embed switched on (whole theme)
- GARAN block added to a template
- GARAN block added to the cart template
- GARAN label embed switched on (cart drawer)
- E-mail snippet installed
Click Check again after you change your theme. The check needs the optional theme access permission. The check warns you if both the block and the embed are active, because the notice would appear twice.